Part of Creating a Campaign: Step 3 of 3.
Step 3: Campaign Knowledge Base (KB)
The Campaign Knowledge Base (KB) step is where you build the knowledge that powers your AI Assistant for your ZipTier campaign. This step has two distinct workflows (Web Sites and Documents) accessible via tabs at the top of the page. Together, they enable the assistant to provide accurate, relevant answers to your audience's questions.
Not sure what to upload, or want tips on preparing content before you start? See KB Best Practices for suggested documents, document preparation, and web content processing guides.
Documents Knowledge Base
Upload files containing the information you want the AI Assistant to use when answering questions.
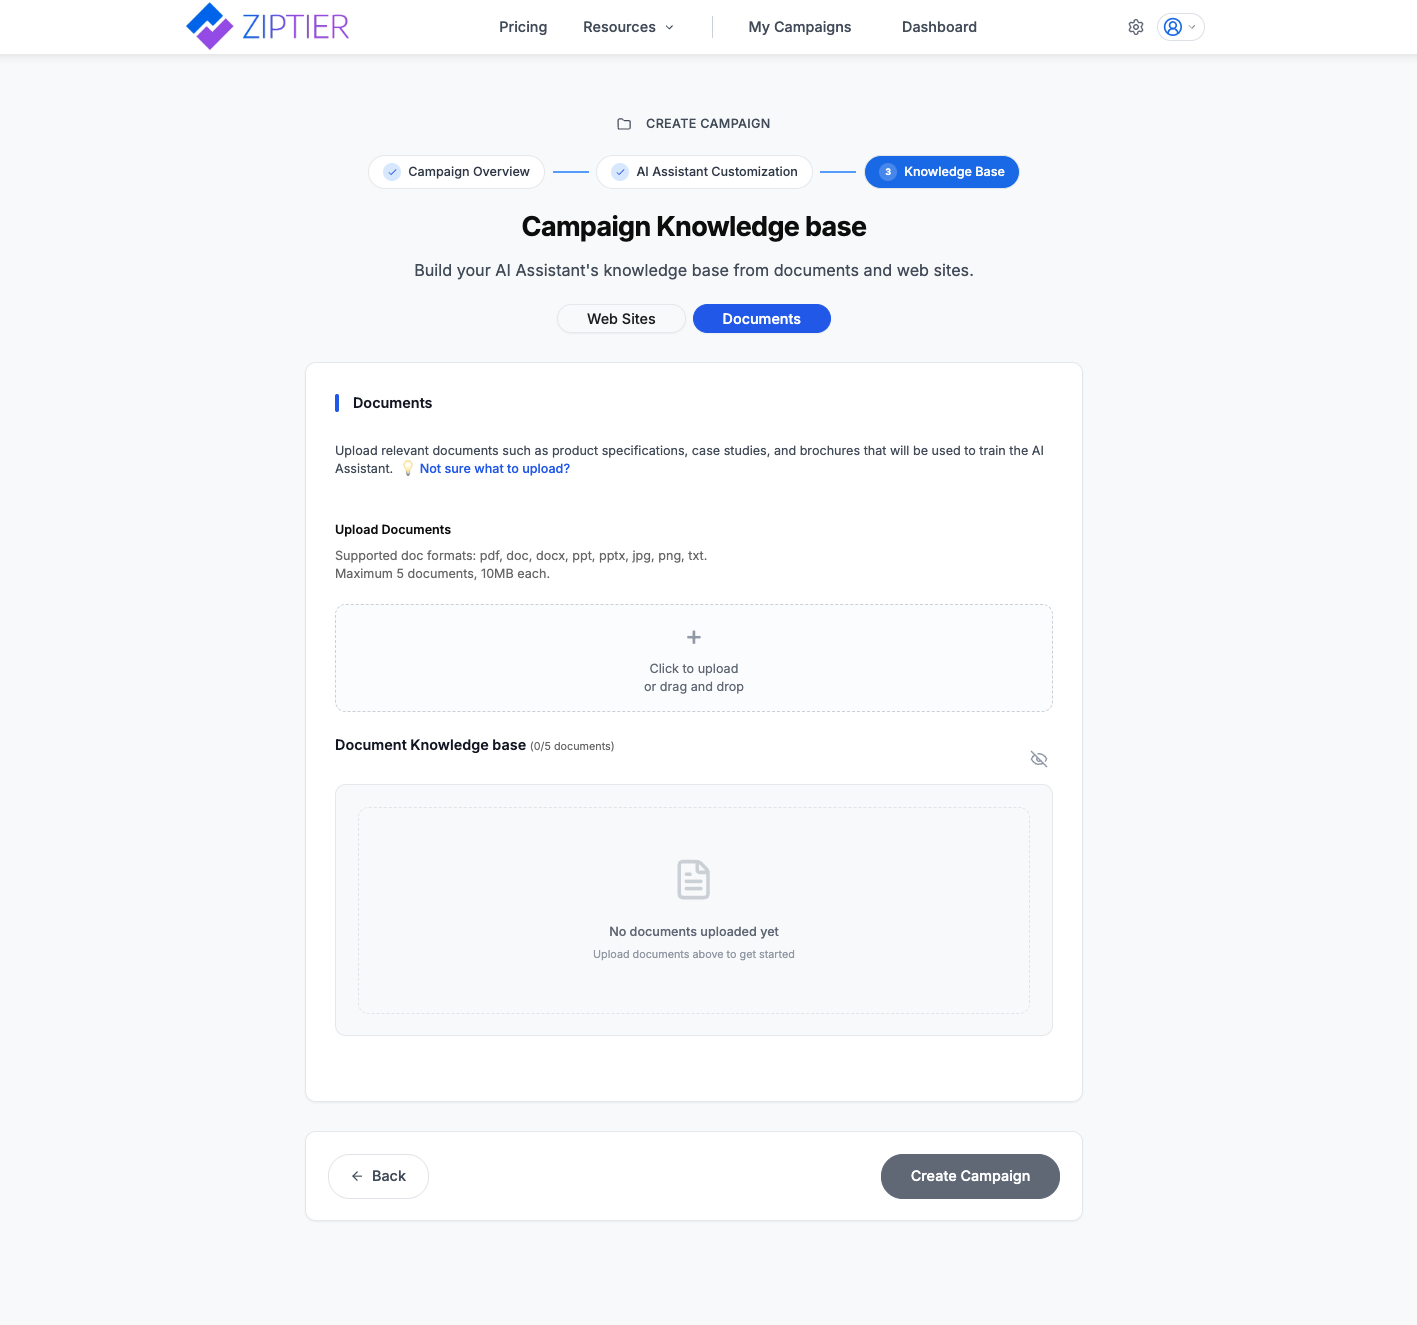
Below is the Documents tab of the Knowledge Base step, showing the upload dropzone and an uploaded file in the Document Knowledge base.
Supported Formats & Limits
- PDF, DOC, DOCX, PPT, PPTX, JPG, PNG, TXT
- The number of documents you can add per campaign depends on your subscription plan: see Subscription Plans for the exact limits on your tier.
Not sure what to upload?
Click the "Not sure what to upload?" link to see suggested documents based on your campaign type. ZipTier provides tailored recommendations for:
- Events: Agendas, speaker bios, session schedules, venue details, FAQs
- Website: Company overview, product specs, case studies, pricing info
For a complete guide on what documents to upload for each campaign type, see Suggested Documents.
Document Upload Process
- Click the upload area or drag-and-drop files
- Monitor progress: green check = success, red X = failure
- Remove or re-upload files as needed
- Uploaded files appear in the Document Knowledge base section below the upload area
Document Visibility
Use the eye icon next to the "Document Knowledge base" heading to toggle whether documents are shown in the AI Assistant's Resources dropdown. When the eye icon is active (blue), documents are visible to prospects; when inactive, documents are used only for training the AI.
Web Pages Knowledge Base
Add web pages from your website to your campaign's knowledge base. The Web Sites tab has two sub-tabs: Web Crawler for discovering and selecting pages, and Web Knowledge Base for managing websites already added.
Web Crawler
Automatically import pages from your website into your Campaign Knowledge base. Use crawl depth and path filters to control which pages get included.
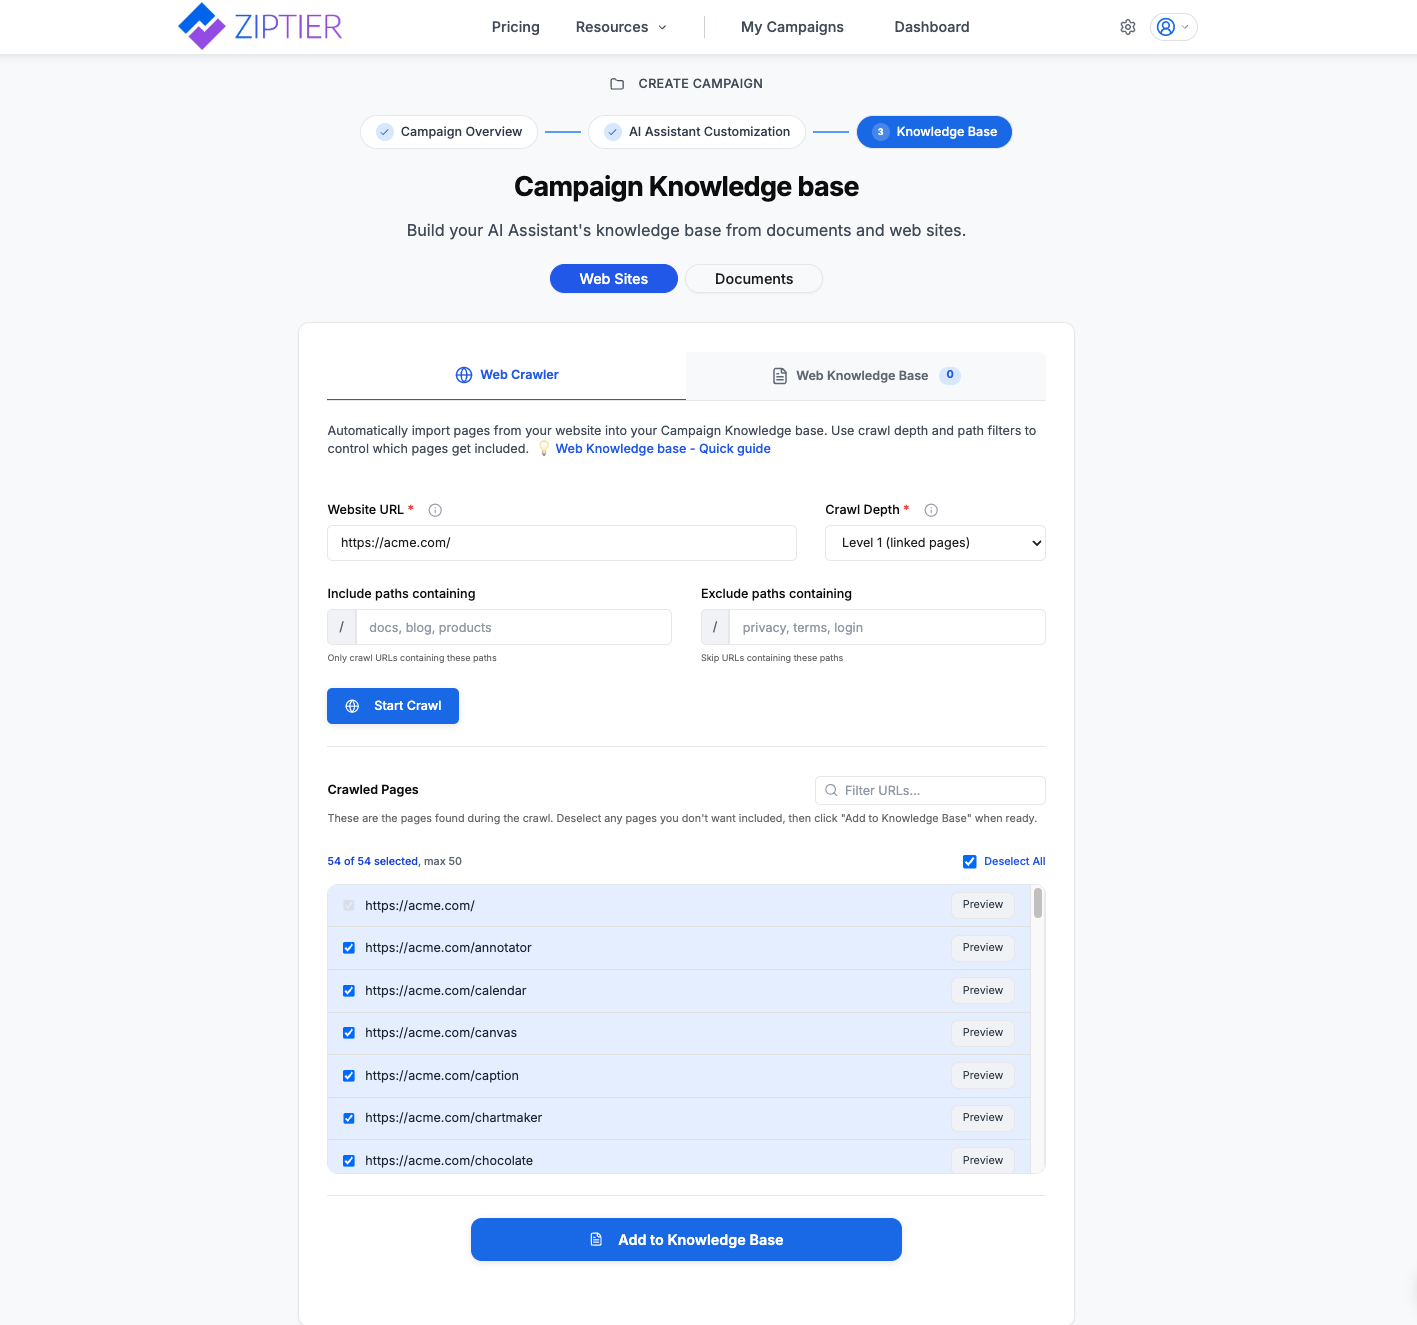
Below is the Web Crawler sub-tab after a completed crawl, listing the discovered pages selected for the knowledge base.
Adding a Website
- Enter the Website URL (required): the starting URL to crawl
- Select the Crawl Depth (required):
- Page only: Just the single URL you entered
- Level 1 (linked pages): The page and all web pages linked from it belonging to the same website domain (e.g., homepage and all pages linked in the navigation menu)
- Optionally set path filters to first select which pages to include and within these pages which ones to exclude:
- Include paths containing: Only crawl URLs that contain these path segments (e.g., docs, blog, products)
- Exclude paths containing: Skip URLs that contain these path segments (e.g., privacy, terms, login)
- Click Start Crawl to begin discovering pages
Reviewing Crawled Pages
After the website crawl completes, discovered pages appear in the Crawled Pages section. From here you can:
- Review the list of discovered pages
- Click 'Preview' to see the extracted version of the web page that will be used to train the AI Assistant
- Deselect any pages you don't want included in the knowledge base. Note - we support adding up to 50 pages per website.
- Search and filter through the page list
Adding to Knowledge Base
Once you've selected the pages you want, click Add to Knowledge Base. This kicks off a background job that parses all selected web pages and adds them to the campaign's knowledge base. A progress bar is shown in the Web Knowledge Base tab while processing is underway. You can step away; processing continues in the background.
During processing, each web page goes through a multi-pass cleanup pipeline that strips navigation menus, cookie banners, footers, and other boilerplate content, keeping only the meaningful text that powers your AI Assistant's responses. For full details on what is retained and removed, see Web Content Processing.
Limits: On the Premium plan you can add up to 15 websites to a campaign (Free: 1, Starter: 5, Pro: 10), with a maximum of 50 pages per website on every plan.
Web Knowledge Base
The Web Knowledge Base tab shows all websites that have been added to the campaign. From here you can manage your web knowledge base:
- View status: See the processing progress for each website
- Manage pages: Expand a website to review the pages in its knowledge base and remove individual pages
- Toggle visibility: Set the site URL on or off for visibility in the AI Assistant
- Rescan a website: Re-crawl a site you already added so the knowledge base picks up your latest content
- Delete a website: Remove a website and all its pages from the knowledge base entirely
Rescanning a Website
Your website keeps changing after you add it: pricing updates, new product pages, revised dates. Rescan re-crawls a site that is already in the knowledge base and replaces its content with a fresh copy, so the AI Assistant stops answering from outdated pages. Use it whenever the source pages change; you do not need to delete the site and add it again.
Starting a rescan
- Go to the Web Knowledge Base tab and find the website card you want to refresh
- Click the circular arrow (↻) Rescan website icon in the card header
- ZipTier switches to the Web Crawler tab, pre-fills the site's original URL and crawl depth, and starts the crawl automatically
Note: The rescan starts from the same URL and depth as the original crawl, but include and exclude path filters are not carried over. If you previously narrowed the crawl with path filters, re-apply them before adding the results to the knowledge base.
Reviewing rescan results
When the rescan finishes, the crawled pages list is grouped so you can see what changed:
- Pages already in your knowledge base appear first and are pre-selected: leaving them checked refreshes their content
- Newly discovered pages appear below and are unselected by default; the list scrolls to the first new page so you can review the additions
- Select the newly discovered pages you want to add, and deselect any existing pages you no longer want
- Click Add to Knowledge Base to start processing, the same as a first-time crawl
Choosing which version to keep
While a rescan is processing, the original version of the site stays in the knowledge base and the card shows a progress bar; your AI Assistant keeps answering from the existing content, so there is no gap in coverage. What happens when processing finishes depends on the results:
- All pages processed successfully: the rescanned version replaces the previous one automatically. Click Done in the results panel to finish.
- Some pages failed: the results panel asks you to choose. Keep rescanned version keeps the new crawl (accepting that the failed pages are missing), while Keep previous version discards the rescan and restores what you had before. The losing version and all of its pages are then deleted.
Decide before you move on: Until you choose, both versions of the site are active in the knowledge base, which can produce duplicate content and inconsistent AI Assistant answers. If you close the panel without deciding, the website card shows an amber warning triangle: click it to reopen the decision. ZipTier also resumes the pending decision automatically the next time you open the campaign.
Rescanning when you have hit the website limit
Rescanning an existing website does not count as adding a new one, so it works even when the campaign has reached its website limit. If you need to refresh content and the Start Crawl button is disabled because the limit is reached, rescan the existing site rather than removing it and re-adding it.
← Step 2: AI Assistant Customization | Next: Post Campaign Creation →