Part of Creating a Campaign: Step 1 of 3.
Step 1: Campaign Overview
The Campaign Overview is the first step in creating a ZipTier campaign. Here, you define what type of experience you're creating and provide the essential details that help your AI Assistant understand its purpose.
Selecting Your Campaign Type
Choose between two primary campaign types based on what your AI Assistant will help with:
Event
- Best for: Webinars, conferences, workshops, trade shows, training sessions
- The AI Assistant will help attendees with event details, logistics, session content, and speaker information
Website
- Best for: Company websites, product pages, research reports
- The AI Assistant will help visitors understand your company, products, or services
For Event Campaigns
When you select Event, you'll be asked to provide:
- Event Type: Select from:
- Conference
- Webinar
- Workshop
- Trade Show
- Seminar
- Customer Summit
- Training Session
- Other
- Event Name: The name of your event as attendees know it
Example: "Data Security Summit 2025", "Marketing Workshop Series" - Expected Attendees: Provide the estimated number of attendees expected at the event.
For Website Campaigns
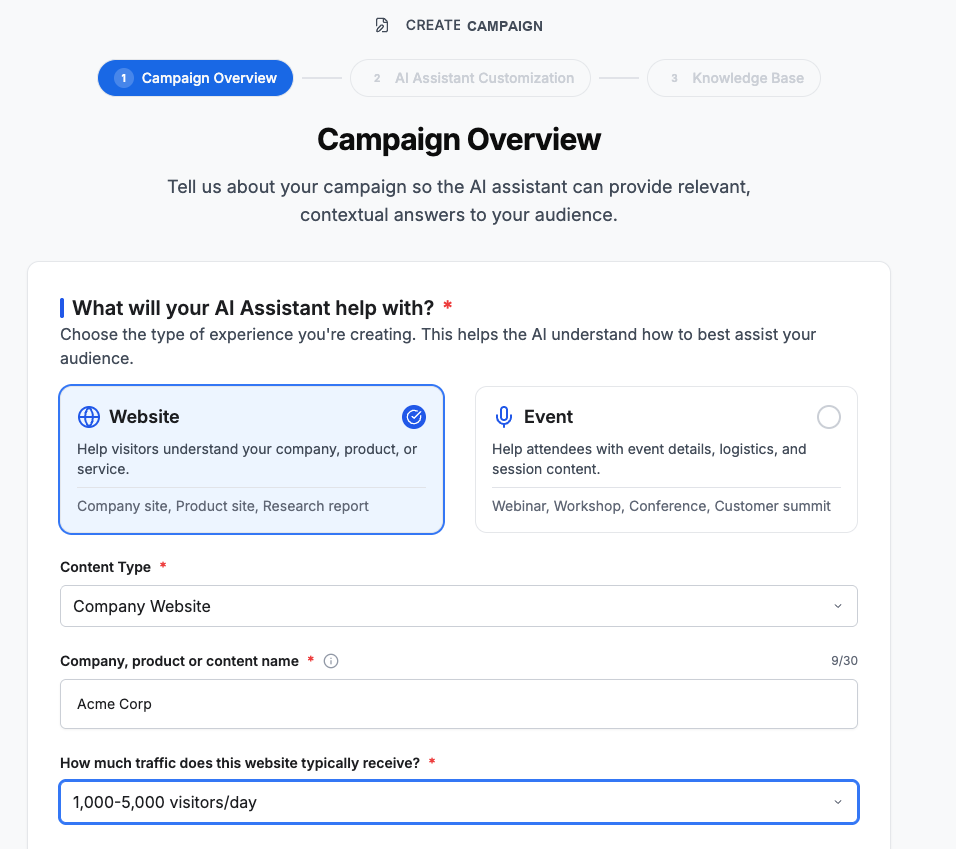
When you select Website, you'll be asked to provide:
- Content Type: Select from:
- Company Website
- Product or Service Offering
- Other
- Title: The name of the company, product, or content
Example: "Acme Inc.", "CloudSync Pro", "Q4 Market Report" - Estimated Traffic: Provide the estimated traffic received by this website on a daily basis.
Below is the Campaign Overview form for a Website campaign, with the content type, company name, and estimated traffic fields filled in.
AI Assistant Availability
Define when your AI Assistant will be available to interact with your audience:
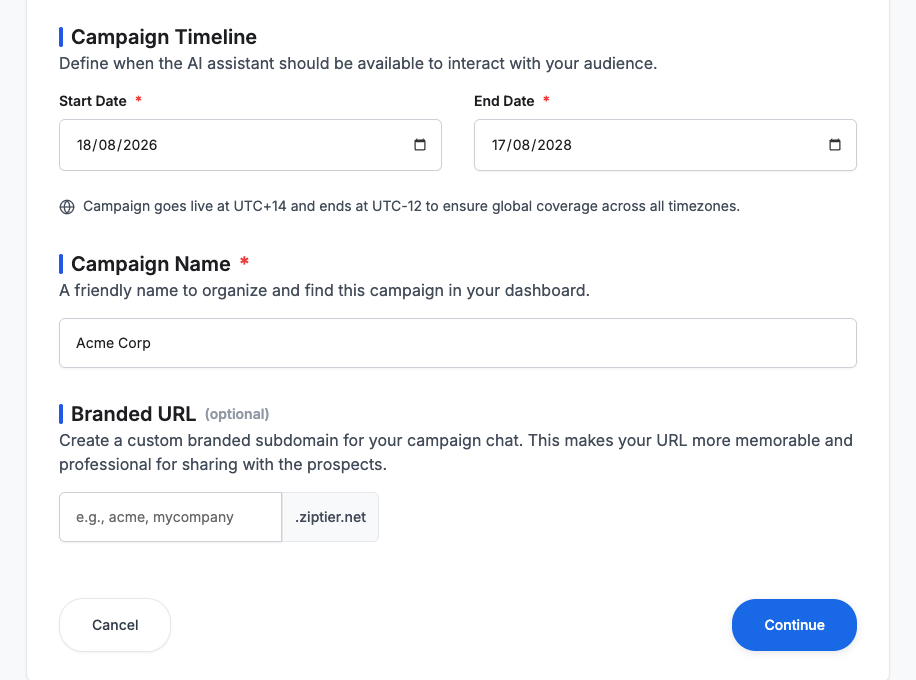
- Start Date (Required): The date this campaign goes live. Users can start using the AI Assistant from this date.
- End Date (Required): The date the campaign stops. The AI Assistant will no longer be available after this date.
Global Coverage: ZipTier ensures worldwide timezone coverage by starting campaigns at UTC+14 (earliest timezone) and ending at UTC-12 (latest timezone). This may appear as starting a day early or ending a day late depending on your location.
Campaign Name
- Enter a friendly name to organize and find this campaign in your dashboard
- This is for internal reference only
- Examples: "Q1 2025 Product Launch", "Marketing Summit 2025"
Tip: Use naming conventions with dates or product names for easy tracking across multiple campaigns.
Below is the campaign timeline section, showing the Start Date, End Date, Campaign Name, and Branded URL fields.
Branded URL (Optional)
Create a custom branded subdomain for your campaign's chat URL. This makes your link more memorable and professional when sharing with prospects.
- Enter a short brand name (lowercase letters and numbers only, up to 20 characters)
- The branded URL will follow the format:
yourbrand.ziptier.ai/chat - Example: Entering "acme" creates the URL
acme.ziptier.ai/chat - A live preview of the URL is shown as you type
Tip: Use your company name or campaign-specific brand for a clean, recognizable URL that's easy to share in emails, presentations, and event signage.
← Creating a Campaign overview | Next: Step 2: AI Assistant Customization →